

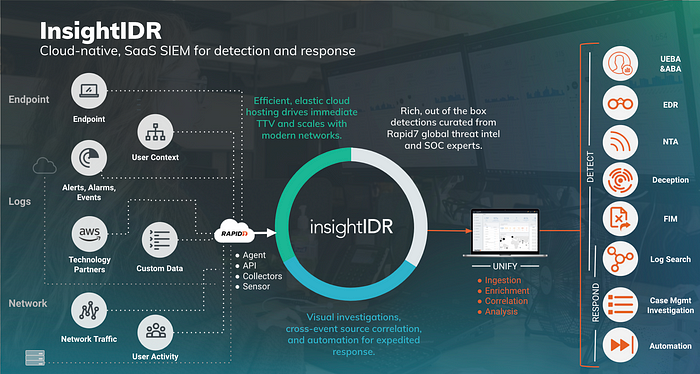
Exploring InsightIDR by Rapid7: A Modern SIEM Solution — Part 4: InsightIDR Deployment


Step 1: Installing the InsightIDR Collector
Before we get into the details, make sure you have access to the InsightIDR console. Follow these simple steps to install the Collector:
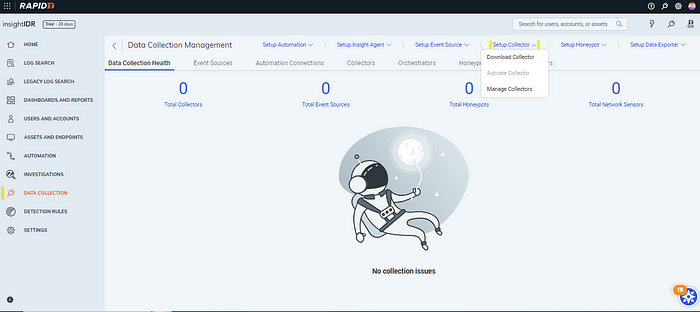
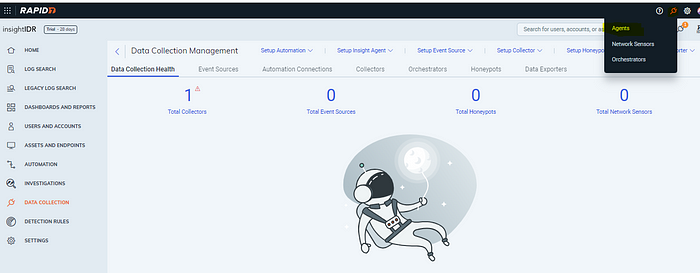
Navigate to Data Collection Management:
- Head over to the console and select ‘Data Collection.’ This is where you manage all your data collection points.
Setup Collector:
- In the Data Collection Management section, choose ‘Setup Collector’ and then ‘Download Collector’ to grab the necessary software.
Deploy Your First Collector:
- If you’re new to InsightIDR, kick things off by clicking ‘Get started.’ This will launch the deployment wizard, guiding you through the process seamlessly.
Download Collector:
- Choose the Collector download tailored to your operating system. This ensures compatibility and smooth integration with your system.
Complete Installation with Wizard:
- The installation wizard is your friend here. Follow the prompts to effortlessly install the Collector on your network.
Copy Collector Agent Key:
- After installation, you’ll receive a unique Agent Key. Don’t forget to copy this — it’s crucial for the activation stage.
Let’s refine the instructions for installing the InsightIDR Collector on Kali Linux:
Selecting the Linux Platform:
- Opt for the Linux platform, specifically tailored for your use on Kali Linux.
Making it Executable:
- After downloading, ensure it’s executable by using the command:
chmod +x <collector>
Installation Process:
- Install the Collector on your Kali Linux system with the following command:
sudo ./<Collector Name>
Checking Status:
- Verify the installation status by using:
sudo collector status
Now, your InsightIDR Collector is set up and running smoothly on your Kali Linux host

Step 2: Activating the InsightIDR Collector
Now that the Collector is installed, let’s activate it:
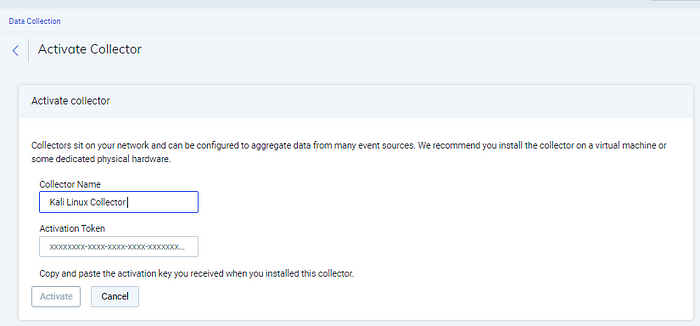
Return to Data Collection:
- Head back to the InsightIDR Console and click on ‘Data Collection.’
Activate Collector:
- Under ‘Setup Collector,’ select ‘Activate Collector.’ This takes you to the activation phase, linking your installed Collector to your InsightIDR account.
Enter Collector Details:
- Give your Collector a name for easy identification. Paste the previously copied Agent Key into the Activation Token field.
That’s it! Your InsightIDR Collector is now activated and ready to enhance your security measures.”
4. Activate: With all the details in place, hit ‘Activate’ to bring your Collector online.
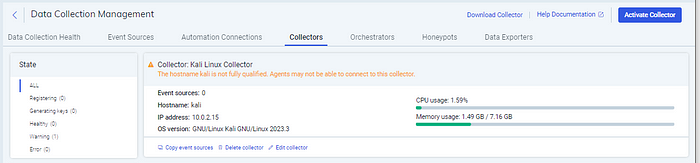
5. It is giving me warning as this debian version is not being supported until now completely.
NOTE: For Installing more Data sources like LDAP , DHCP Consult Rapid7 Academy
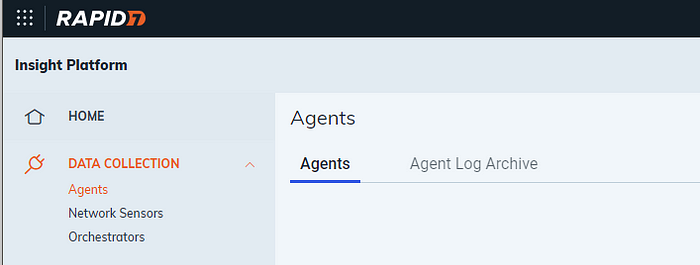
Installing the InsightAgent
- Go to Agents from the dashboard
2. Under Data Collection Install the preferred Agent version for your Operating system
3. Downloading the Intel x64 Agent for Linux:
- Choose the Intel x64 Agent specifically designed for Linux.
4. Generating a Token for the Agent:
- Create a token to execute the installer script. This token contains a region identifier and a universally unique identifier (UUID).
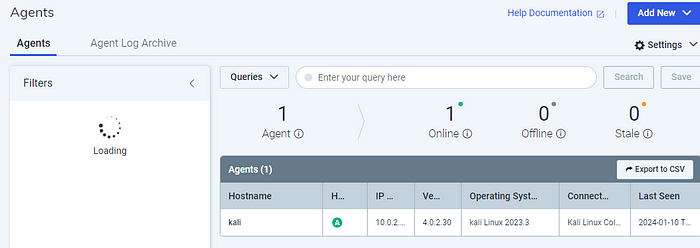
5. Viewing Your Machine under the Agent Tab:
- Once the installation is complete, your machine will be visible under the ‘Agent’ tab.
Now, you have successfully downloaded and configured the Intel x64 Agent for Linux, generated a token for installation, and can now monitor your machine under the ‘Agent’ section.
In this segment of our Rapid7 InsightIDR series, we’ve effortlessly configured and activated the InsightIDR Collector on various platforms, providing a seamless foundation for advanced threat detection. Stay tuned as we continue to explore the robust features of InsightIDR, empowering you in safeguarding your digital landscape effectively.