Fortigate Configuration & Practical Series — — Part 1

Let’s kick off our Fortigate adventure! In this first part, we’ll start by setting up Fortigate on VMWare Workstation. Follow these simplified steps to make it easy and enjoyable:
Download Fortigate VM: Start by downloading the Fortigate VM of your preferred version for deployment on VMWare Workstation. For this series I am using Fortigate version 5.6
Assign a Static IP: To ensure easy and consistent access, we’ll assign a static IP. Here’s how:
Open the Fortigate command line.
Type
config system interfaceto enter the interface configuration mode.Use
showto list all ports in use. Since we're focusing on one, type:edit port1Set the static IP and mask with:
set <ip>/mask (e.g., set 192.168.32.3/24)Allow access for ping:
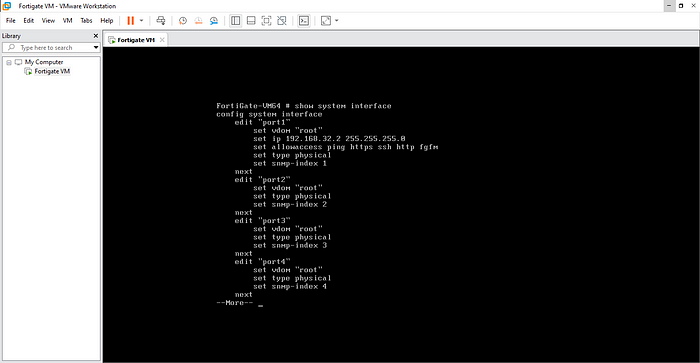
set allowaccess pingDouble-check by viewing the system interface:
show system interfaceThis ensures that your static IP is assigned correctly.
By following these steps, you’ve now smoothly set up Fortigate on VMWare with a static IP for easy network access

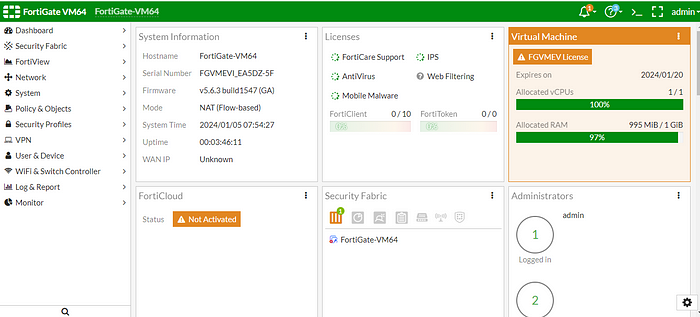
11. Fantastic! Now, take a look at the results. In my case, the IP has been successfully assigned. Once I start the VM, I can effortlessly open the graphical user interface (GUI) of the firewall. This means we’re on the right track, and our Fortigate setup is ready for action! Feel free to explore and enjoy navigating through the GUI to discover the full potential of your firewall. Stay tuned for more exciting insights in our Fortigate Configuration & Practical Series!

