

Splunk: A Comprehensive SIEM Tool


In this guide, we’ll explore the steps to set up Splunk for log collection from various sources using virtual machines (VMs). This setup is an integral part of leveraging Splunk as an effective Security Information and Event Management (SIEM) tool. Here’s how you can get started:
Choosing Your Virtualization Software: The first step is to select a virtualization platform. Two popular choices are VirtualBox and VMware Workstation. For the purposes of this guide, we’ll use VirtualBox, known for its ease of use and compatibility.
Acquiring Pre-Loaded VMs: You have a couple of options for obtaining your virtual machines. One convenient method is to download pre-loaded VMs of Kali Linux or Ubuntu from OSBoxes. Alternatively, you can download the OVA files directly from the official sources tailored for VirtualBox.
Setting Up in VirtualBox: Once you’ve chosen VirtualBox as your platform and downloaded the desired VM image (in our case, a Kali Linux image), it’s time to set it up. Here are the steps:
Launch VirtualBox.
Click on ‘Add’ and navigate to where you’ve saved your downloaded VM file.
Select the VirtualBox file (usually with an
.ovaor.vboxextension) that you've downloaded.

Cloning Your Virtual Machine:
- Once you’ve successfully loaded your chosen VM into VirtualBox, the next step is to create a clone. This allows you to have two separate machines: one to serve as an Apache Server and the other as a Splunk Server. Here’s how to clone:
Right-click on the loaded VM in VirtualBox and select ‘Clone’.
Follow the on-screen instructions to complete the cloning process.
Name your cloned machines appropriately for easy identification; for instance, “Apache Server” and “Splunk Server”.
Checking and Noting IP Addresses:
2. With both machines set up, it’s important to check their IP addresses. This is done using the ifconfig command:
Start each VM.
Open the terminal and type
ifconfig.Note down the IP addresses displayed; these are crucial for network configuration and connectivity checks.
3. Setting Static IP Addresses: To ensure consistent network communication, it’s recommended to set static IP addresses for both machines. This process involves modifying network settings:
Open the network settings on each VM.
Change the IP configuration from DHCP to static.
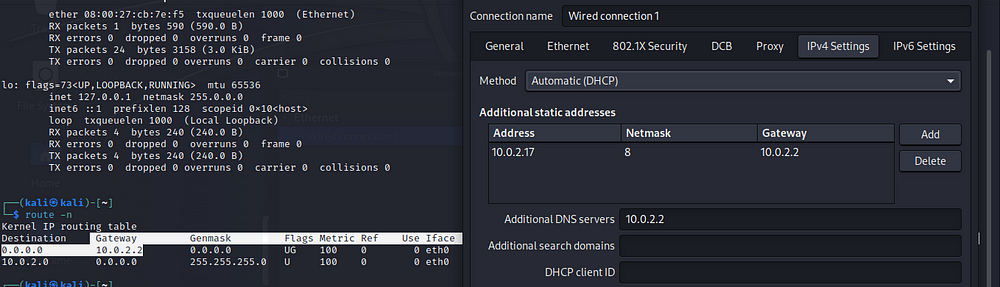
Enter the desired static IP address, subnet mask, and default gateway.
When setting static IP addresses for your virtual machines, it’s important to choose IPs that are within the same subnet as the dynamic IP range provided by your network. This ensures seamless network integration. For instance, if your dynamic IP is
10.0.2.15, select a static IP close to this range, such as10.0.2.16,10.0.2.17, and so on. This strategy maintains network consistency and avoids potential IP conflicts.The default gateway can be found using the command
route -n. Note this down as it’s essential for network routing.
Assigning Static IP to the Second Machine:
Similarly, assign a static IP address to the second virtual machine. This ensures both machines are on the same network and can communicate with each other. Follow the same steps as before to set a static IP.
Once done, write down the IP addresses of both machines. Keeping a record of these will be useful for later tasks.
Starting the Apache Server: On your Apache Server VM, you will start a simple HTTP server. This can be done using Python’s built-in HTTP server module. Here’s how:
Open the terminal in your Apache Server VM.
Run the command:
python -m http.server <port>, replacing<port>with your desired port number, like 8080.This command will start a web server on the specified port.
Accessing the Server from the Splunk VM: Now, test if the Splunk VM can access the Apache Server:
Open a web browser in the Splunk VM.
Type in the IP address of the Apache Server followed by the port number (e.g.,
<ip address>:<port>).If set up correctly, you should be able to access the server hosted on the Apache VM from the Splunk VM.
Important Note:
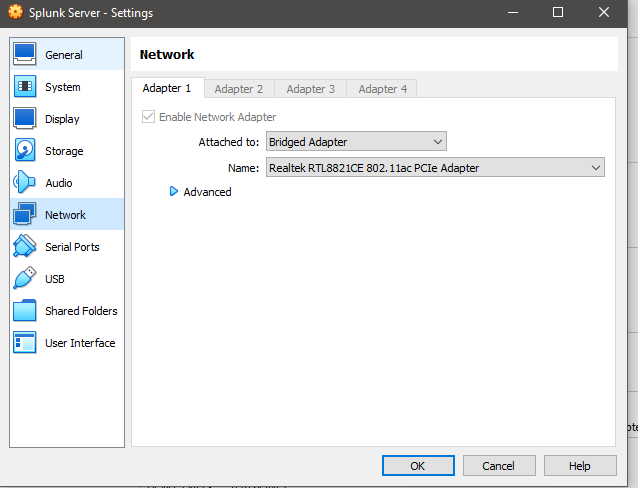
If you encounter issues with connectivity (like not being able to ping or access the server on the other VM), check your VirtualBox network settings.
In cases where the network is set to NAT, consider changing it to Bridged Adapter for both VMs. This setting allows the VMs to appear as distinct entities on the network, facilitating better communication between them
Installing Splunk Universal Forwarder and Splunk Enterprise:
- To gather and analyze data effectively, you’ll need to install Splunk Enterprise on your Splunk VM and Splunk Universal Forwarder on your Apache VM. Here’s how to do it:
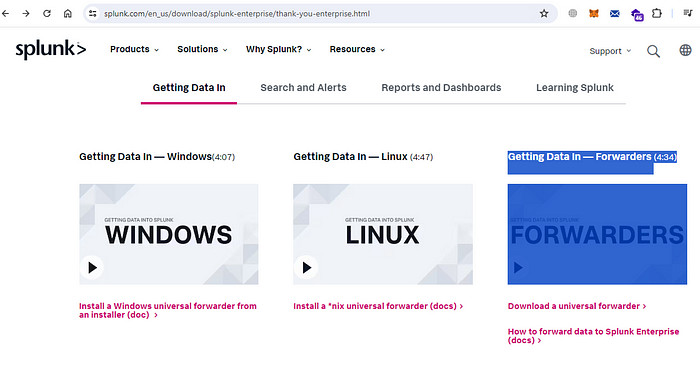
a. Download Splunk Enterprise and Universal Forwarder:
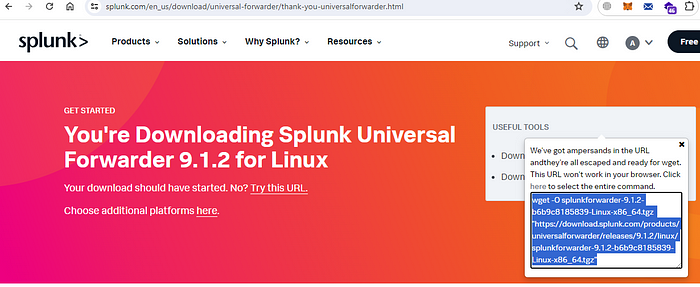
Visit the Splunk website to download the necessary software.
Locate the download pages for Splunk Enterprise and Splunk Universal Forwarder.
Choose the appropriate versions for your operating systems.
. Install Splunk Enterprise on the Splunk VM:
On your Splunk VM, open a web browser or use the command line to navigate to the Splunk Enterprise download link.
Download the installation package.
Install Splunk Universal Forwarder on the Apache VM:
Similarly, on the Apache Server VM, navigate to the download page for Splunk Universal Forwarder.
Download the Splunk Universal Forwarder package.
- Command Line Installation: After downloading, you can proceed with a command-line installation for both Splunk Enterprise and Universal Forwarder. This method gives you more control and insight into the installation process:
For Splunk Enterprise:
Locate the downloaded file on your Splunk VM (typically in the
Downloadsdirectory).Use the command line to navigate to the directory containing the downloaded file.
Extract and install Splunk Enterprise using Splunk’s provided installation commands.
tar -xzvf <Splunk> -C /opt/
//Use sudo in case of privileges issue.
- For Splunk Universal Forwarder:
Repeat the same process on your Apache VM to install the Splunk Universal Forwarder.
Ensure you’re using the commands specific to the Splunk Universal Forwarder installation.
Up the Apache server on apache VM using the command
sudo apt install apache2
sudo service apache2 start

//Now look whether apache is running or not
sudo service apache2 status
Starting Splunk Services:
With Splunk Enterprise and Splunk Universal Forwarder installed on their respective VMs, the next crucial step is to start the services. This ensures that Splunk Enterprise begins collecting and analyzing data, and the Universal Forwarder starts forwarding logs to the Splunk server.
a. Starting Splunk Enterprise Service:
On your Splunk VM, open the terminal.
Run the command provided in below link to start Splunk Enterprise. This typically involves navigating to the Splunk installation directory (/opt/)and executing a start command.
Starting Splunk Universal Forwarder:
Similarly, on your Apache VM, open the terminal.
Navigate to the Splunk Universal Forwarder installation directory. (/opt/)
Execute the command to start the Splunk Universal Forwarder. This is usually a similar command to starting Splunk Enterprise but in the Universal Forwarder directory.
I hope you found this guide helpful in setting up Splunk and the Splunk Universal Forwarder with your Apache server. If you enjoyed this article or found it useful, please feel free to give a clap and share your thoughts in the comments. Your feedback is greatly appreciated!
Stay tuned for Part 2, where I’ll delve into the intricacies of ingesting logs into Splunk from the Apache server and demonstrate how to perform effective queries in Splunk. This next installment promises to further enhance your skills in leveraging Splunk for powerful data analysis and insights. Don’t miss it!